Free and Easy Granny Square Crochet Pattern for Beginners
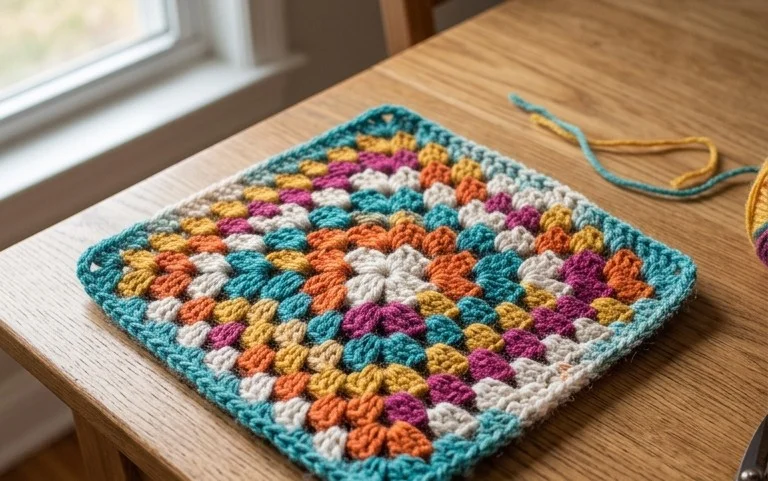
Soft cotton yarn twisted into a familiar geometric shape makes these squares a joy to hold in your hands. This project turns simple loops of yarn into a flat, structured fabric that gains weight and character with every round you complete. New crafters find the repetition comforting, while those who want quick results appreciate how fast a block grows from just a few double crochet stitches. You will master the rhythm of working into chain spaces to keep the edges straight. Building these squares gives you a stack of building blocks ready for blankets or pillows. Following the basic loop technique ensures every corner stays tight and clean.
Why You’ll Love This Pattern
The Classic Crochet Granny Square is the quintessential project for building fundamental skills while creating a versatile building block for larger items like blankets or tote bags. You will appreciate the rhythmic nature of the double crochet clusters, which allow you to establish a consistent tension quickly. Because this pattern relies on chains and double crochets, it is highly portable, making it an ideal choice for taking along on a commute or working on during short breaks. This project is also a fantastic way to utilize leftover yarn, as each square requires only a small amount of yardage, allowing you to create high-contrast or multicolored designs without purchasing new materials.
This was the first pattern I ever finished, and the clear instructions made it easy to see how the stitches connect to form a perfect square. It taught me how to keep my corners sharp and my tension even throughout the process.
— Sarah, beginner crocheter
Pattern Overview & Skill Level
- Skill Level: Beginner
- Approximate Time: 30–45 minutes per square
- Construction: Worked in joined rounds, starting from the center and expanding outward
- Finished Dimensions: Approximately 5 inches by 5 inches using medium weight yarn
Materials & Supplies Needed
- Yarn: Worsted weight (#4), 100% cotton or acrylic, approximately 20–25 yards per square.
- Hook Size: 5.0 mm / H-8
- Notions: Tapestry needle for weaving in ends, scissors, and optional stitch markers to identify corner spaces.
- Safe yarn substitutions: You can use DK weight yarn for a smaller, tighter square, though you may need to add an extra round to match the finished dimensions. Wool blends provide more drape but may require more careful washing than acrylic.
Stitch Guide & Abbreviations (US Terms)
- ch = chain
- st = stitch
- sl st = slip stitch
- dc = double crochet
- dc cluster = 3 double crochet stitches worked into the same space
- sp = space (the gap created by the chain stitches)
Step-by-Step Pattern Instructions
Granny Square Body
- Foundation: Ch 4, join with a sl st to the first chain to form a ring.
- Rnd 1: Ch 3 (counts as first dc), work 2 dc into the ring, ch 2, *3 dc into the ring, ch 2; repeat from * two more times. Join with a sl st to the top of the beginning ch-3. (12 dc, 4 ch-2 spaces)
- Rnd 2: Sl st into the next dc and into the corner ch-2 sp. Ch 3, 2 dc in same sp, ch 2, 3 dc in same sp (first corner made). *Ch 1, skip 3 dc, (3 dc, ch 2, 3 dc) in next corner ch-2 sp; repeat from * twice more. Ch 1, join with a sl st to top of beginning ch-3. (24 dc, 4 ch-2 spaces, 4 ch-1 spaces)
- Rnd 3: Sl st into the next 2 dc and into the corner ch-2 sp. Ch 3, 2 dc in same sp, ch 2, 3 dc in same sp. *Ch 1, 3 dc in next ch-1 sp, ch 1, (3 dc, ch 2, 3 dc) in next corner ch-2 sp; repeat from * twice more. Ch 1, 3 dc in last ch-1 sp, ch 1, join with a sl st to top of beginning ch-3. (36 dc, 4 ch-2 spaces, 8 ch-1 spaces)
- Rnd 4: Sl st into corner sp. Ch 3, 2 dc in same sp, ch 2, 3 dc in same sp. *[Ch 1, 3 dc in next ch-1 sp] twice, ch 1, (3 dc, ch 2, 3 dc) in next corner ch-2 sp; repeat from * around, ending with ch 1, join with sl st. (48 dc, 4 ch-2 spaces, 12 ch-1 spaces)
Finishing
Fasten off the yarn, leaving a 6-inch tail. Use your tapestry needle to weave the end through the back loops of the stitches, ensuring the tail is secured under at least three sets of stitches before trimming the excess. Gently pull the corners outward to block the square into a clean shape.
Care & Washing Instructions
- Machine wash your finished item on a gentle cycle in cold water with mild detergent.
- Lay the square flat on a clean towel to air dry, ensuring it is reshaped into a square before it dries completely.
- Avoid using high heat in a tumble dryer, as this can shrink natural fibers and stiffen synthetic yarn.
Pro Tips & Common Mistakes to Avoid
Maintain consistent tension by ensuring your slip stitches at the start of each round are not pulled too tightly, as this can cause the square to curl. Use a stitch marker in the top of your starting chain-3 of each round to easily locate the point where you need to join your final slip stitch. To weave in ends invisibly, feed the tapestry needle through the base of the double crochet posts on the wrong side rather than through the visible top loops. If you want to adjust the size, simply add more rounds using the pattern established in Round 4; note that each additional round will consume significantly more yarn than the previous ones.
Frequently Asked Questions
Can I use a different weight of yarn for this pattern?
Yes, you can use any yarn weight, but you must adjust your hook size to match the yarn manufacturer’s recommendation. Using a different weight will change the final dimensions of your square.
Why is my square curling at the edges?
Curling usually happens if your tension is too tight or if you are accidentally skipping stitches. Check your count after each round to ensure you have the correct number of clusters and corner chains.
How do I join these squares together?
You can join squares using a whip stitch along the back loops or by using a slip stitch join to create a decorative raised ridge between the squares.
Is it okay to sell items made from this pattern?
You are welcome to sell finished items made from this design, provided you credit the original pattern source. Always check the specific usage terms provided by the designer for any limitations on commercial production.
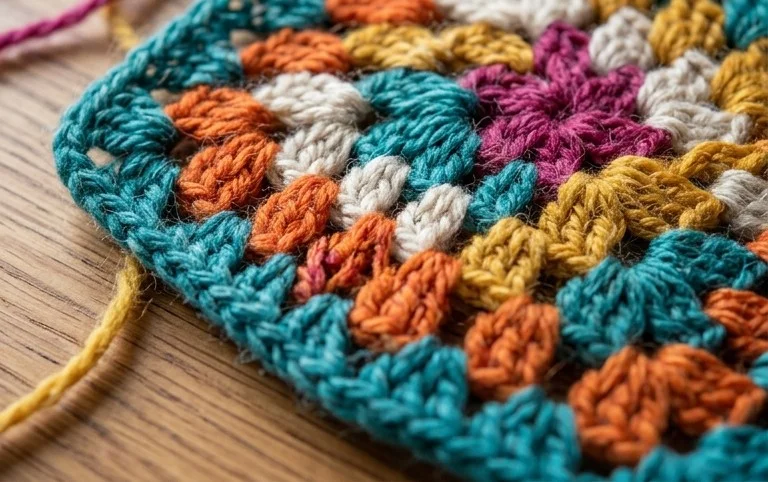
A pile of finished squares represents hours of calm work and a thoughtful addition to your handmade collection. You can swap the standard worsted cotton for a fuzzy mohair blend if you want a softer, haloed effect for your next winter throw. Posting a photo of your stack helps others see how different color combinations look in practice, so share your progress online. Visit the blog archives for more free patterns to expand your stash of squares and tackle your next project with confidence.